Reverse Engineering My Label Printer
Problem
It’s finally time to do the write up for this project. This project has been going on for a quite a few months and it’s finally at a place where I am happy to call it finished. There are still a few features that could be implemented but I’m more than happy with where it is at the moment and am willing to bench the project for now.
As usual, I’ll start with a description of the problem. I have a label printer purchased some years ago on the recommendation of a close friend that uses the same label printer regularly in his business. I had decided to start my own venture of selling repaired controllers on eBay. A venture which honestly didn’t go very well. However, one thing I did do that has more than payed off the printer is sell replacement controller springs. If you search on eBay for a replacement spring for your PS5 or PS4 controller you may see my listing there. With sales comes shipping, and with shipping comes address labels. I decided early that I don’t want to write out my address on each envelope I send so I bought a butt-load of address stickers for my address from a printing shop. This sped up the process of shipping, but I still had to print out or write out the address for my clients. And so, on the recommendation of that friend I bought the label printer.
The label printer was an L+H2 Thermal Printer that was selling for about $200 CAD at the time. I was running Windows at the time so it worked well. I plugged it into my computer over USB and would print my labels. A lot of times I would go months without a sale and then would forget the exact settings I needed to use to print a nicely sized label. Sometimes I would print one label in the wrong orientation over 5 labels. Other times it would print so tiny you couldn’t read the address. Since the printer was meant for a large variety of label sizes it had a lot of options that didn’t always work as expected. Additionally, some programs would print differently. Printing from a screenshot (Windows + Shift + S) would produce different output then printing a snipping from within Adobe PDF Reader. Eitherway, it was frustrating.
Then I met a girl. A girl that’s very ambitious and has her own business pursuits. So naturally, I offered her use of my label printer. We setup a printing station and left a space for the label printer. However, there was an issue: the printer only printed over USB. So I’d need a computer there to print the labels. Also during this time I finally decided to switch my main OS to linux. And surprise, surprise, L+H2 didn’t offer linux drivers for their printer. I thought it would be an interesting challenge to try and reverse engineer their printer driver and get it working on my Linux computer. Then I could setup a pi or other SBC to run the print server in the designated spot later.
So the requirements for the project were:
- Print off linux and Windows (my girl uses Windows…. for now :D)
- Simplify the settings with an abstraction layer of some sort to automate the settings for the printer.
Additionally, we only need two sized labels so in the back of my mind I had the idea that I will purchase another label printer once the project is done so that we have a dedicated printer for each label size.
I should also mention that I email L+H2 support for linux drivers but never heard anything from them.
Solution
Reverse Engineering
To start with I decided to download the MacOS drivers as Mac is just linux that’s highly restricted and painted pretty (don’t shoot me). After taking a look at the files I found that it contains a .ppd file and a binary called rastertolabel. At the time I had no idea what these were but after some research I discovered that the .ppd file is a xaml like file that specifies directives to the printing service about a printer. It specifies all the settings available for the printer and what steps need to be done to print the print job. The big step here is calling the rastertolabel binary.
That binary is what’s called a filter. The filter converts streamed data from one type to another. My typical use case was trying to print a jpg or png of an address. So the printing service pipeline would look at the .ppd file for the printer, know it needs to call rastertolabel, and try to get the image data into the raster format so that it can then call the filter. The printing service is called CUPS and anyone who’s done printer administration on linux is familiar with it. What they may not be familiar with is CUPS filters. Now of course, I don’t have the source code for rastertolabel and the particular binary I downloaded was compiled for Mac. So I need to recreate the source. How do we do that? We break out the reverse engineering tools.
In my youth I tried to explore IDA Pro. I thought it would be cool to know how to take apart a program. That feeling of being cool didn’t get me very far. But this time I would be cool! I would impress my girl!
IDA Pro takes the machine instructions for a binary file and then tries to give you the high level code again. The problem is that when compilers compile code, they modify it a lot to optimize it. So what you see in IDA Pro or other reverse engineering tools is never what the original code looked like. It’s just a best attempt to reverse to compilation process. Additionally, when compiling to a binary, that fancy function name you put so much effort into gets completely stripped. So the typical process of reverse engineering is figuring out what a small section of code does, pull it into a function if you need to, and give it your own name. On top of that, a lot of times the code the reverse engineering tool outputs doesn’t make sense and you need to read the assembly (or learn to read the assembly in my case) to understand what’s going on.
Unfortunately, the filter I was looking at wasn’t that small. It was a small binary that included only a few files, but it wasn’t only 20 lines that forwarded the raster stream data to the printer. Also, there were sections of the code that IDA Pro straight up couldn’t interpret. I decided to see if I could find another tool and I found Ghidra. This is a reverse engineering tool developed and maintained by the NSA. I decided having a second reference / interpretation of the code would be helpful so I had both tools open while working on this project. Slowly and diligently I used the tools to build up a replica of the filter. I didn’t just copy and paste. I was trying hard to understand what the filter was doing and why. If I didn’t know what the code did, there would be no way I could debug it when things would go wrong in the future (and I was 100% certain they would).
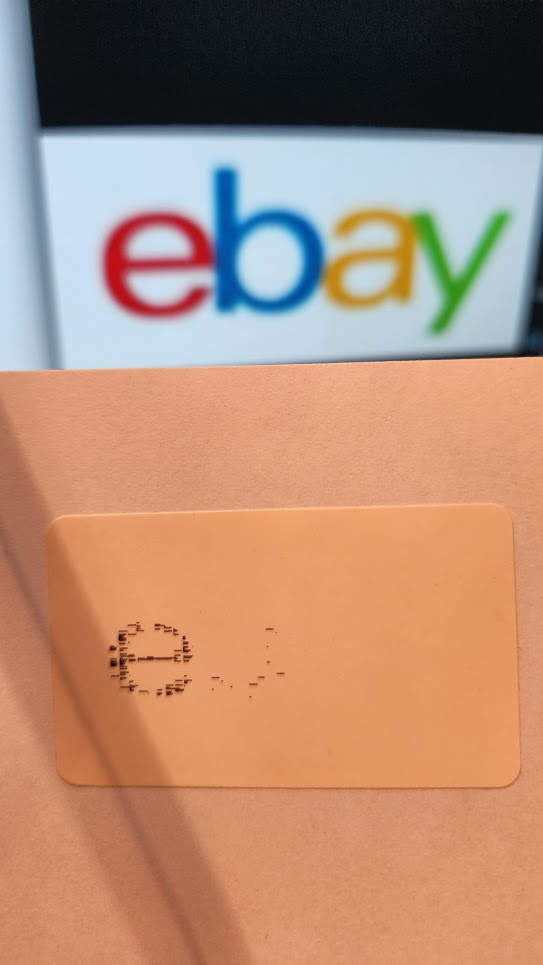
After the code was completed, I built the filter for my linux computer and tried it out. I made an image file of the ebay logo and tried printing it out. It …kinda… worked? But there was very clearly something wrong

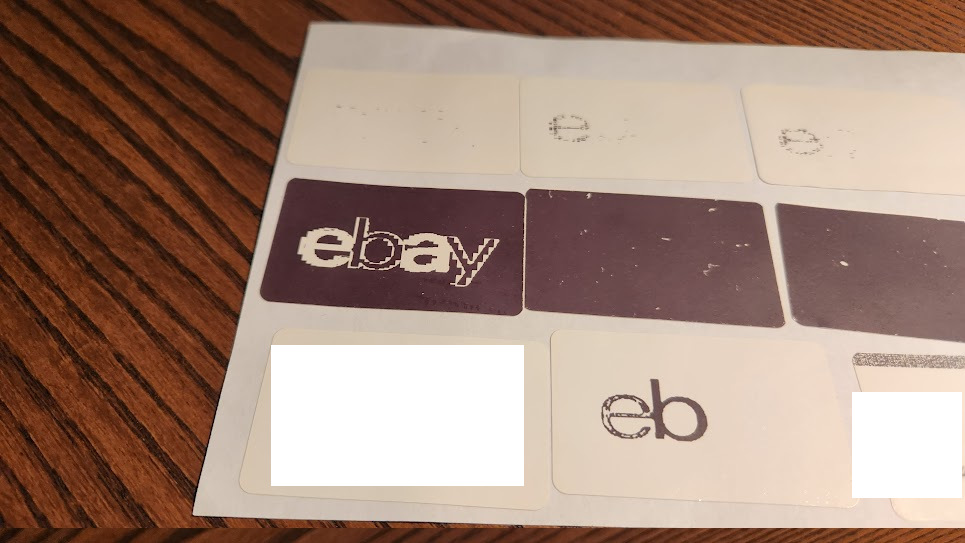
I tried out some things to fix it. Here are some more attempts.

Eventually, I got it working! The white blocks are actual addresses for one of my clients (usually I get a burst of inspiration whenever I make a sale and then take a break after about a day of work).
I was very happy once I got it working. A big step was done and now I could print over USB on my linux computer. If you’re interested in my code you can find it here: Github: Linux Driver
Making it wireless
The next step was moving the printer from my personal computer to the printing station we setup. I decided to use a board I had lying around. It’s an Olimex A64 (1Ge16GW). This is an open source hardware board that I got manufactured off of Mouser. It’s a 4 arm64 core SBC and it has a personalized debian linux distro. It also has a WiFi chip so it supports wireless. My next mission was to compile the filter for the board. I tried compiling directly on the board but this would result in full system halts. The SBC would become unresponsive and I would need to pull the plug to reboot it.
I decided to cross compile using Docker. I love using docker when I don’t need to. It sets up a consistent environment that anyone can use at any point in time. All the files I used to make the docker container and cross compile on it are in the repo above. To actually get the cross compile working I had to use buildx. I still don’t fully understand what it does but it seems to be required to run the docker container under a different binary mode. Perhaps it just provides the appropriate hypervisor for the docker stack to run off of.
Once cross compile was working I put the binary on the SBC and tried to print wirelessly. It worked… sometimes. Sometimes it didn’t. In the end it turned out I had an uninitialized struct in my filter code. Talk about amateer hour. I patched the bug, rebuilt, and updated the SBC. And it worked! … sometimes
Adding an abstraction layer
The issue was that the label printer worked when I printed directly from my Linux computer using a raw queue (which, btw, is also deprecated.. or going to be) ld -d printer print.png. The issue was that other programs on Linux and Windows did not respect the raw queue setup in the CUPS settings on the SBC. If you printed on Windows, any printing dialog would give you all the default system options (that don’t include raw) and add padding to the print. This would result in super small and highly padded text making the printed label unusable. I tried looking for a good solution but nothing seemed promising.
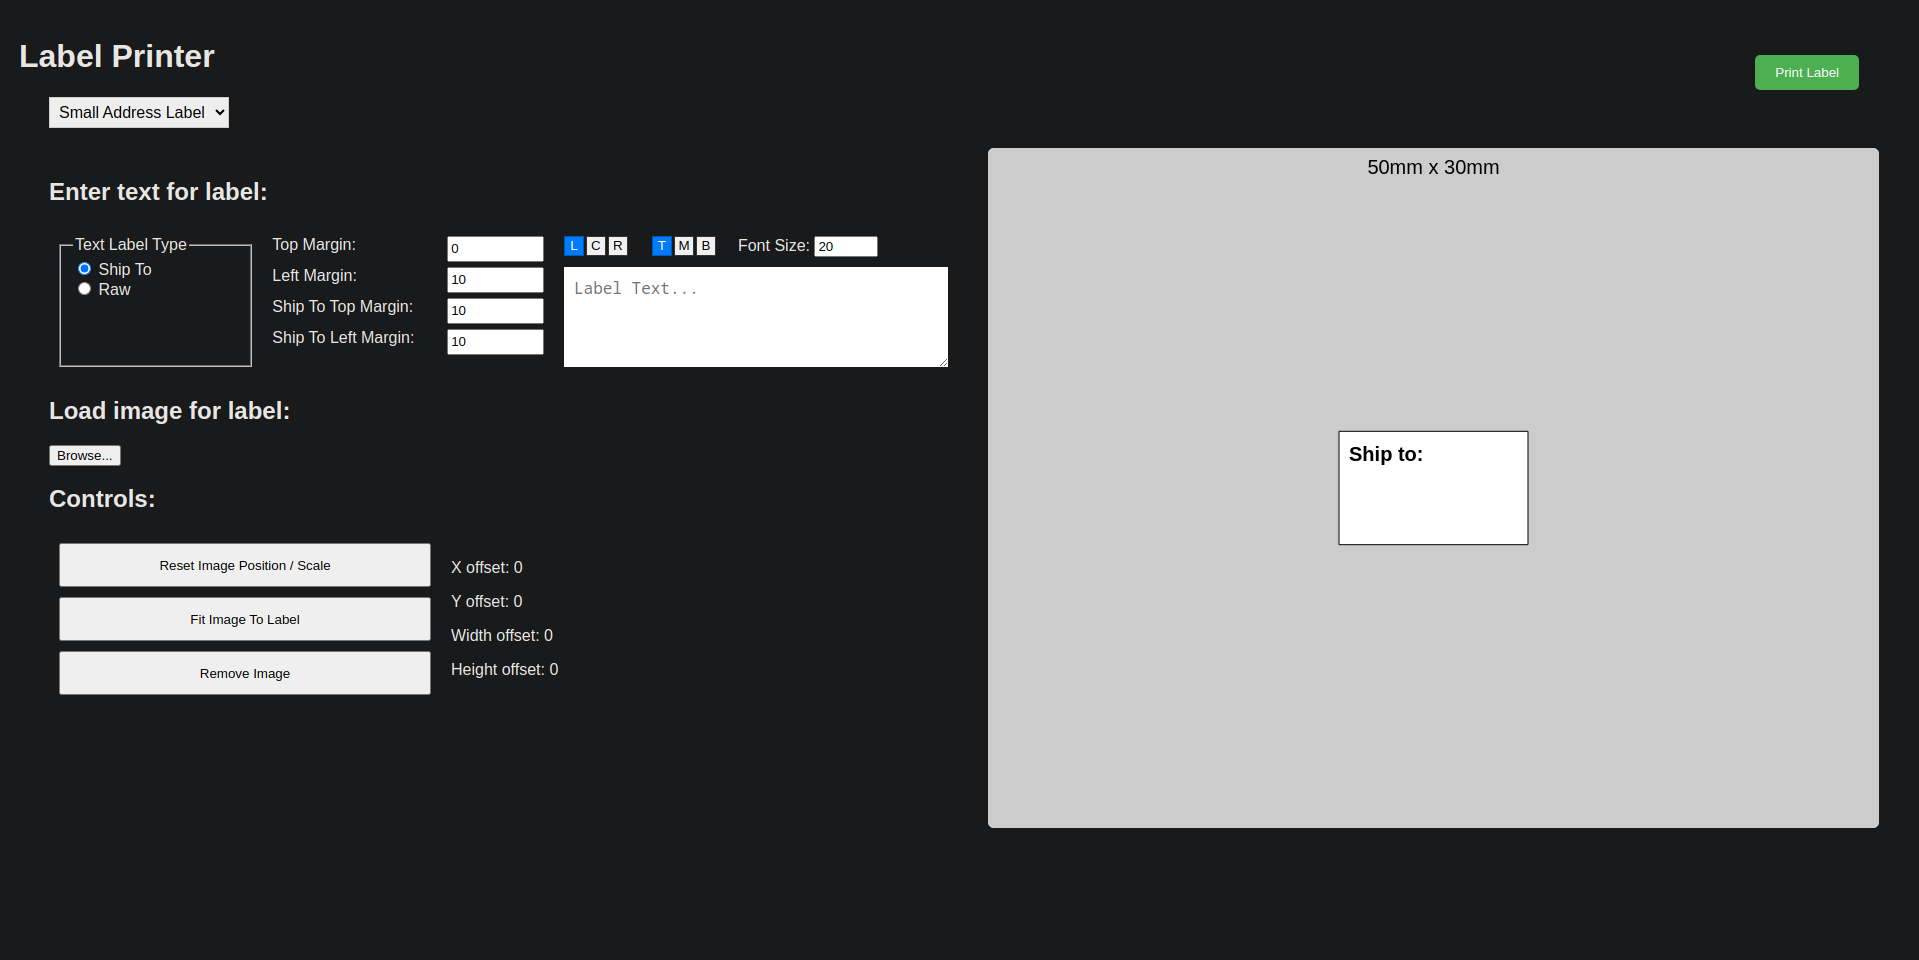
I ended up deciding to run my own print portal directly off the SBC. The idea was simple, allow the user to select their desired label size, upload an image, and hit print. Also, if they wanted a custom text label, the print portal would provide some way to write the label on the spot. It’s been a while since I did any kind of web development but I learned about some cool new features including canvas, CSS flex and CSS grids. I built the web portal fairly quickly (with respect to how long the rest of the project took). You can see the portal in its current state below:

There was an issue, the website was static. It had no way to access system resources to print or save a png to print to disk. So I created a nodejs backend that listened to incoming messages on port 3000 (should have made this 9000 but I’m too lazy now) and wrote the image given to it to disk. Then I created a bash script that watches a specific folder for files and sends the files to their respective printer. If the user selects the small label, the system puts a small.jpg file on disk and the bash script sends it to the small label printer. Likewise, if the file is big.jpg, it will go to the large label printer.
Finally, I setup some systemd services that would start everything on boot.
If you’re interested in the print portal or the systemd files you can find the corresponding git repo here: Github: Print Portal Note: this is a different repo than the print driver from earlier.
Wrap up
I’m very happy with how everything ended up. I decided to buy a second label printer so we could have one for each size we needed. However, it was not easy finding an L+H2 printer. Their website listed some for sale for $600 CAD. Amazon (where I bought it before), didn’t have any in stock. I ended up finding a printer that looked exactly the same for about $150 CAD. It was from a company called Jaden. I know a lot of companies will use the same product and slap their own branding on it before selling it at a markup. I decided to give it try and surprise, surprise, my custom driver worked perfectly. I must say I was very impressed by the Jaden packaging and additional materials. Plus it was cheaper than the original L+H2 I purchased. If you’re considering buying one, definitely choose Jaden. I should also mention that Jaden has a wireless version of the printer too. If my L+H2 had that feature perhaps this project would have been a lot easier.
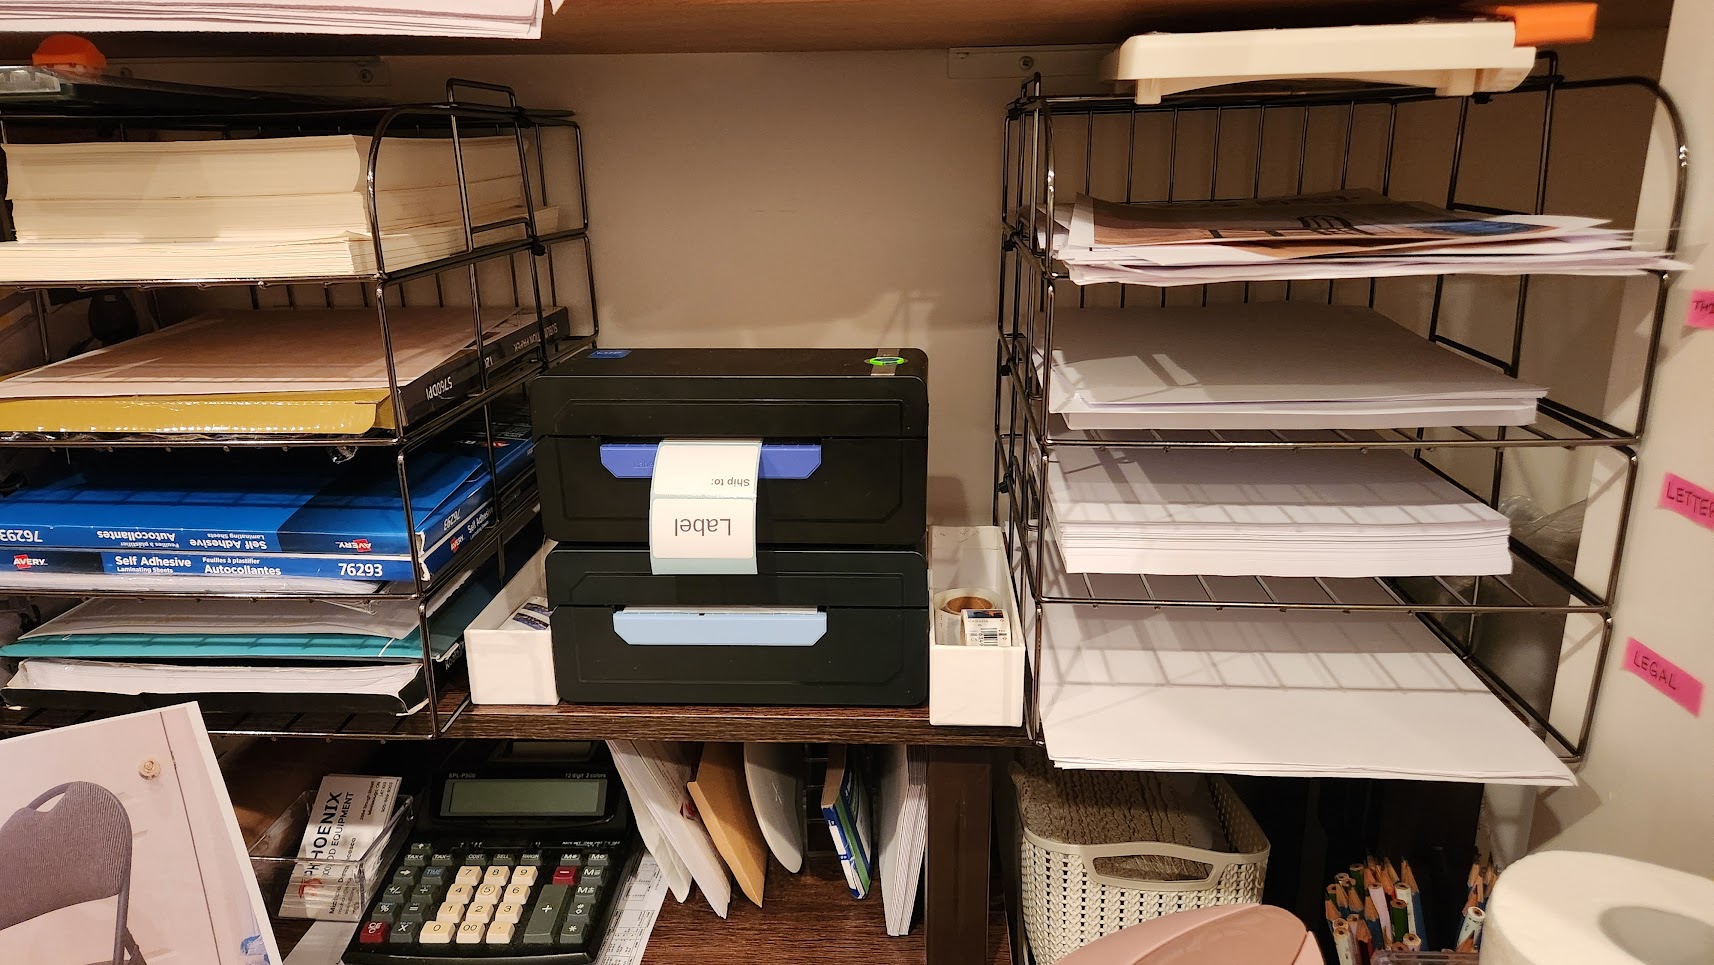
In the end, I learned a lot from this project. I finally got my feet wet in a practical setting with IDA Pro. I brushed up on my web development skills. And I created something that was needed and that will improve our workflow as we expand our entrepreneurial pursuits. Thank you for reading. This post was a longer one than usual. I’ll leave you with a picture of our two wireless label printers.
